


Your MRI Scan Experience
 Download PDF
Download PDF
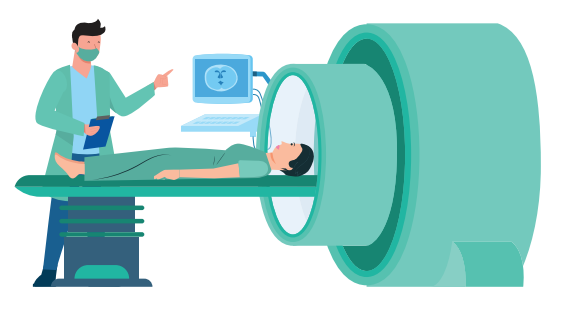
Your MRI Scan Experience
“We want to ensure that you receive the highest level of healthcare. This means keeping you educated and informed about what is involved in the different stages of your diagnostic procedure. If you have any questions or concerns, please speak with your doctor or medical technician.”
What is an MRI?
Magnetic Resonance Imaging (MRI) is a scan that uses a magnetic field and radio waves to create detailed images of the organs and tissues in your body to evaluate, diagnose, and monitor several different medical conditions. We want to ensure that you receive the highest level of healthcare. This means keeping you educated and informed about what is involved in the different stages of your diagnostic procedure. If you have any questions or concerns, please speak with your doctor or medical technician.
Why is an MRI Needed?
You may require an MRI Scan if your doctor needs a clearer picture of your brain, spinal cord, nerves, muscles, ligaments, and tendons than regular X-rays and CT scans can provide. There are different MRIs to help evaluate and diagnose various medical conditions.
Types of MRIs
• Brain and Spinal Cord MRIs
• Cardiac MRIs
• Body MRIs
• MRIs of Bones and Joints
• Breast MRI
Contrast MRIs
You may be advised that your MRI needs contrast. This contrast helps the medical team see tumours, inflammation, infection, and blood supply to certain organs and blood vessels. There are different types of contrast, namely oral, IV, and rectal. Your medical team will advise which you will be receiving.
If you are advised that your MRI will need contrast, a creatinine blood test is required within 30 days before the MRI examination for:
• Patients who are diabetic (insulin and non-insulin-dependent types), and
• Patients who are 70 years or older,
• Patients who have a history of kidney insufficiency/kidney masses/single kidney.
During an MRI with contrast, you might experience the following sensations:
• Warmth throughout your body
• A warm feeling between your legs, similar to urination
• A metallic or salty taste in your mouth
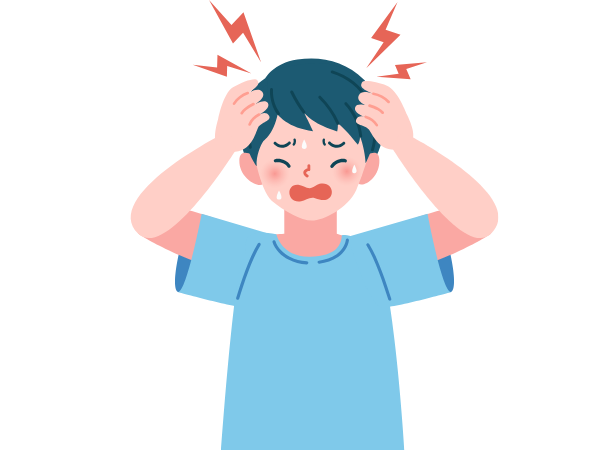
• A brief headache
• Itching
What are the Risks of an MRI Scan?
The risk from an MRI Scan is very low, as the magnetic field is not harmful to you. If you need an MRI with contrast dye, in rare cases there is a small risk of an allergic reaction to the dye. Make sure you discuss any allergies with your medical team.
Who will be involved in the MRI Scan?
Your MRI Scan will include a few team members.
• Radiology Technologist who will assist you onto the MRI couch, position you correctly, and start the scan, as well as monitor your safety throughout the procedure;
• Radiologist, the Medical Doctor who will report on the MRI scan; and a
• Nurse who will assist the team at any point and insert an IV cannula and contrast if needed.
This is what you can expect when you come to Health City for an MRI Scan.
- Step 1 When you arrive at Health City, you will check in at Reception.
- Step 2 A member of the Health City team will escort you to the diagnostic wing.
- Step 3 The Radiology Technologist will ask you to read and sign a consent document for the MRI Scan. You will need to sign a second form if you require contrast. At this time, you will be asked to drink a certain amount of oral contrast (if necessary).
- Step 4 You will be instructed to change into a patient gown and remove any items that may contain metal. The radiology team member will then accompany you to the MRI scanner room. The nurse will insert an IV cannula (if necessary).• All jewellery including watches• Eyeglasses• Hairpins/Barrettes containing metal• Dentures• Hearing aids• Underwire brasThe radiology team member will then accompany you tothe MRI scanner room. The nurse will insert an IV cannula(if necessary).
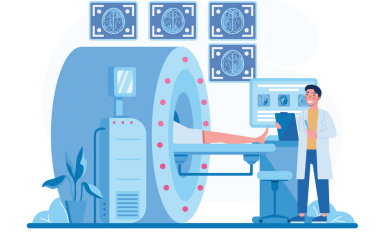
- Step 5 An MRI scanner is a large tube with holes on either end. You will be placed on a moveable table that slides into the tube while a radiology team member monitors you from another room. The MRI machine makes a lot of noise while the procedure is taking place. Many patients opt to bring earplugs and listen to music or books on tape during the process. Please ask the Radiology Technologist if this is permitted. MRI scans vary in time, but some can be quite lengthy, taking several hours depending on the area needed for imaging
- Step 6 Once the imaging has been completed, the radiology team member will assist you off the couch.
- Step 7 You may get changed back into your clothes.
- Step 8 You may exit the department/hospital. Your MRI report will be sent to the ordering physician within 48 hours. Please ensure you have your follow-up appointment booked after.


Plan/Activities
You'll likely experience pain and discomfort immediately after the surgery, which can be managed with pain medications prescribed by your doctor. Your shoulder will be immobilised with a sling to protect the repair and promote healing. You may begin gentle exercises as instructed by your surgeon or physiotherapist to prevent stiffness and improve circulation.
You'll continue to wear the sling most of the time, only removing it for gentle exercises and hygiene. Physiotherapy may begin, focusing on passive range-of-motion exercises to prevent stiffness and maintain flexibility. You'll likely need assistance with daily activities like dressing and bathing, as you'll have limited mobility in your shoulder.
Step 1 When you arrive at Health City, you will check in at Reception.
Step 2 A member of the Health City team will escort you to the diagnostic wing.
Step 3 The Radiology Technologist will ask you to read and sign a consent document for the MRI Scan. You will need to sign a second form if you require contrast. At this time, you will be asked to drink a certain amount of oral contrast (if necessary).
Step 4 You will be instructed to change into a patient gown and remove any items that may contain metal.
The radiology team member will then accompany you to the MRI scanner room. The nurse will insert an IV cannula (if necessary).
• All jewellery including watches
• Eyeglasses
• Hairpins/Barrettes containing metal
• Dentures
• Hearing aids
• Underwire bras
Step 5 An MRI scanner is a large tube with holes on either end. You will be placed on a moveable table
that slides into the tube while a radiology team member monitors you from another room. The MRI
machine makes a lot of noise while the procedure is taking place. Many patients opt to bring earplugs and
listen to music or books on tape during the process. Please ask the Radiology Technologist if this is
permitted. MRI scans vary in time, but some can be quite lengthy, taking several hours depending on the
area needed for imaging.
Step 6 Once the imaging has been completed, the radiology team member will assist you off the couch.
Step 7 You may get changed back into your clothes.
Step 8 You may exit the department/hospital. Your MRI report will be sent to the ordering physician within 48 hours. Please ensure you have your follow-up appointment booked after.
Gradually, you'll begin active range-of-motion exercises, still under the guidance of a physiotherapist. Strengthening exercises may be introduced, but they'll be low-impact and focused on rebuilding the muscles around your shoulder without putting too much strain on the repair site. Depending on your progress, you may be able to start weaning off the sling during this time, but it will still be needed in certain situations to protect your shoulder.
Your range of motion and strength should continue to improve. You'll likely be able to return to more normal activities of daily living, but you should still avoid heavy lifting or strenuous activities. Physiotherapy will continue, gradually increasing in intensity as your shoulder heals.
You should be able to gradually return to full activity, including sports or physically demanding work, although you may still need to be cautious and avoid overexertion.
Frequently Asked Questions
Other Patient Pathway Posts
Pulmonary Embolism

What to Expect After a Head Injury

Recovering After A Concussion

How to Care for a Child Who Has Croup

Choking: What You Can Do to Help
Understanding Your Headache & When to Seek Help
Understanding Burns
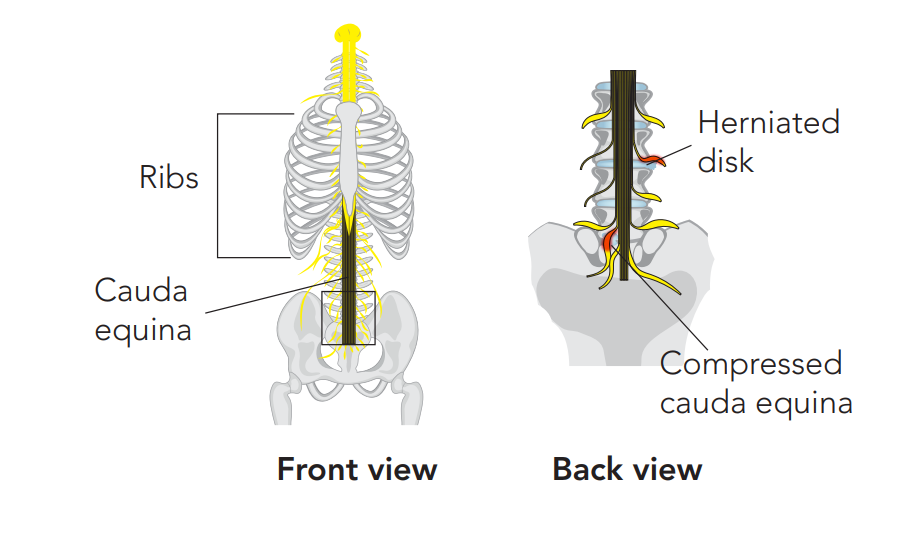
Recognising the Red Flags of Cauda Equina Syndrome
Recovering After Cauda Equina Syndrome
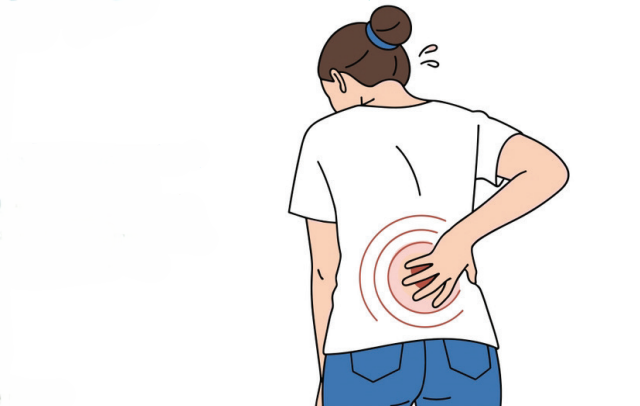
Recovery From Back Pain


